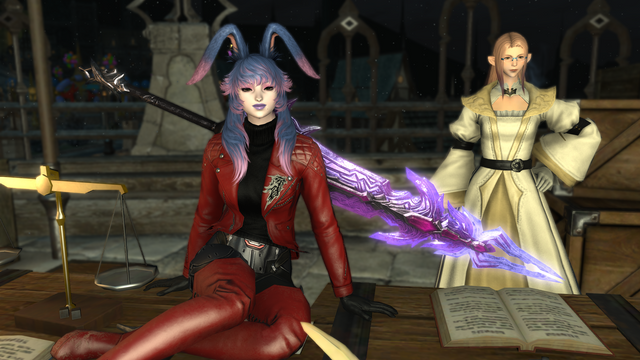
FFXIV glamour is, for many players, the true endgame with Glamour Dressers, Glamour Plates, and various other tricks applied to achieve perfect fashion. Cosmetics make the game go round in various ways (such as million-gil crafting materials on the market board). So it’s worth knowing how to properly apply glamours in-game. Unfortunately, it’s a strangely complicated process that isn’t explained well in FFXIV. Hence the reason for this guide to glamour.
Glamour, for the record, is just FFXIV “transmog” — which is to say applying visuals from one piece of gear while retaining the stats of another. You might know it as “Layered Armor” in Monster Hunter or transmogrification in World of Warcraft. But in FFXIV, glamour isn’t typically tied to special vendors. Instead it all starts with Glamour Prisms.
Glamour Prisms – FFXIV Glamour Guide
Glamour Prisms are consumables. If you want to apply the appearance of one piece of gear (e.g. a pair of boots or a weapon) to another, you can burn one Glamour Prism from your inventory in the process. This is the simple part! You can also get Glamour Prisms all over the damn place. Though one of the easiest methods is spending seals at your Grand Company headquarters — like the Maelstrom command near the Aftcastle of Limsa Lominsa if you’re a Maelstrom member. If you really want prisms in bulk, though, it’s easy to just craft them yourself.
It all starts at level 15. You can stop by Western Thanalan (coordinates X:12.6, Y:14.3) to speak with Swyrgeim. She offers the quests “If I Had a Glamour” and “Absolutely Glamourous,” which enable you to apply and remove glamours, respectively. You can also acquire nearly identical glamour quests much later in the game, at Revenant’s Toll, but either option has the same rewards.
Also found at level 15 is the quest “Submission Impossible,” which is another Revenant’s Toll mission. You also need to have any crafting class at level 15 — not just a combat one. This unlocks the ability to purchase Master Recipe glamour books (e.g. Master Goldsmith: Glamours) for each and every crafting Job. It’s worth grabbing them all in one go since they’re quite cheap. You’ll save yourself a return trip if you ever decide you want the rest.
The tomes themselves are bought from Goberin (back in Western Thanalan) or Tataroga (once again in Revenant’s Toll). Crafting Glamour Prisms requires Clear Prisms: a crafting material you can also buy from these vendors. Once you have the recipes and the components, you can finally start crafting. It’s one of the simplest crafts in the game with no quality level to worry about, too. So you can safely use Quick Synthesis to make dozens of prisms in moments. You can find the recipes (without searching) by going to your Crafting Log, selecting the Special Recipe tab, and button down to Other Master Recipes.
Phew!
Glamour Dresser – FFXIV Glamour Guide
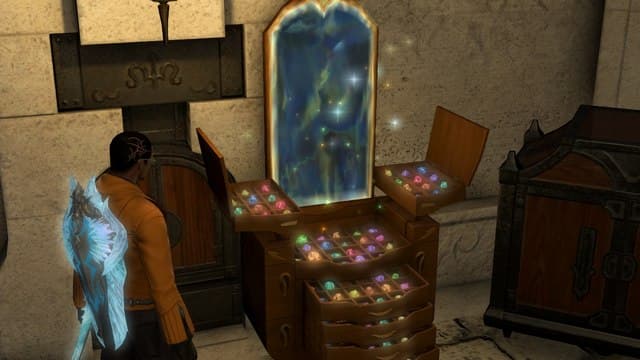
Naturally, you probably don’t want to burn a Glamour Prism every single time you apply one piece of gear to another. That’s where the Glamour Dresser comes into play. This piece of furniture is found inside every inn at most major FFXIV cities. Just talk with any innkeep and opt to retire to your room.
Once you open the Glamour Dresser, you can add nearly any piece of equipment in the game by burning one Glamour Prism. This process is semi-permanent (which is to say it lasts until you decide to remove an item) and lets you apply and reapply that item as a glamour as many times as you want — all for the cost of just that one, initial prism.
To apply a glamour from the Glamour Dresser, however, you need to actually access the Glamour Dresser in person. That means retiring to an inn room and using the device. From there, select a piece of equipment from any of the tabs, and choose “Apply Glamour.” This will do exactly that — apply the glamour — to whatever piece of gear you are currently wearing in that slot. Applying a chest glamour from the dresser, for instance, will overwrite your current chest piece with that appearance.
This is the easiest (not to mention most cost effective) way of applying individual glamours while keeping your inventory clear. As such, it’s what the vast majority of players will use during their time with FFXIV.
Armoire – FFXIV Glamour Guide
Speaking of a clear inventory, the Glamour Dresser can only hold 400 items. That’s quite a lot, but it fills up fast if you just dump everything into it willy nilly. Luckily there’s a better option for many glamour items. Certain, special items given to the player for specific reasons can be dropped in the standard Armoire. This is found right next to the Glamour Dresser and is mostly used to save space on sillier items you get from events, Job quests, and achievements.
Sadly, most equipment doesn’t fit that bill. Though the game will warn you any time you try to add something to the Glamour Dresser than can instead go into the Armoire. The benefit is pretty simple: anything in the Armoire doesn’t take up one of your 400 dresser slots. On the other hand, you can’t individually apply these items as glamours, either. Instead you need to add them to one of your Glamour Plates (more on that in the next section).
Basically: if you have an item that can go into the Armoire, and you don’t intend to apply it individually as a glamour very frequently, put it in the Armoire. It’ll clear up some of your precious inventory space.
Glamour Plates – FFXIV Glamour Guide
Back at the Glamour Dresser, we have the option to Edit Glamour Plates. This is the part that tends to intimidate people. Though once you have a handle on the rest of the Glamour Process, it’s quite simple. Glamour Plates are nothing more than full-body loadouts of cosmetics: preset outfits, essentially.
You can save up to 15 Glamour Plates (i.e. outfits) at once at your Glamour Dresser. You can assemble each costume from anything found in the Glamour Dresser or the Armoire (which is where the latter storage method finally comes in handy. And once a plate is saved, you no longer need to access your dresser to wear that specific outfit. You can simply access the Glamour Plate button from the character menu, next to your Gear Set List and Recommended Gear buttons.
The confusing parts for some are class, gender, and race restrictions. A handful of items in FFXIV simply cannot be equipped to certain races. For example: a Miqo’te cannot wear the Viera Chestwrap or Auri Pantalettes. Those are exclusive to Viera and Au Ra characters, respectively. You also can’t apply gear that only Black Mages can wear as a glamour to your Dark Knight, or any other combination of Job-restricted equipment. Some items are marked as “All Classes,” however, and these are mostly meant specifically to as fashion items.
If you try to apply a Glamour Plate to your character, and that outfit includes something you cannot currently wear, the glamours will still go through — but only the valid ones. If your boots are ineligible as a glamour, but every other piece of armor is allowed, your boots will remain visually unchanged while the rest of the Glamour Plate applies. That’s the closest thing to a “punishment” the process applies, so don’t be afraid to try your plates on different Jobs to see how things look.
Dyes – FFXIV Glamour Guide
Now here’s where things can actually get a tiny bit punishing. Dyes really make the outfit in FFXIV — and some dyes can be exceptionally expensive.
Most, however, are not. You can buy dozens of different dyes from all sorts of different vendors across Eorzea: at the Firmament in Ishgard, from Dyemongers in every major city, at certain Beast Tribe NPCs, etc. Rarer dyes can go for a pretty penny. In fact, you can spend real money on the consumable items in the Mog Station if you so choose.
Just be careful when mixing dyes with glamours. Dying any item will be permanent until you overwrite it with a different dye or use Terebrinth (an item akin to paint thinner available from your Grand Company vendor) to remove it altogether. If you dye a glamour, however, that dye is lost whenever you remove the glamour. That includes dyeing a glamour that you applied via the Glamour Dresser without a Glamour Plate.
This is… admittedly a bit confusing. But you’ll get the idea very quick if you spend 50,000 gil on a single use of dye, only to lose it after changing out a glamour at your dresser. A good rule of thumb is: don’t use dyes on glamoured items unless you’re certain you’ll be using that color for a while or don’t mind losing it (such as if you used a cheap, common dye).
If you want to dye glamours with expensive options, it’s better to do so while editing a Glamour Plate. That saves the dye to that particular plate — meaning you won’t lose your investment if you overwrite the item’s appearance later. And if you just want to see what a particular item looks like with a particular color, select the “Try On” button when clicking on the gear. You can then click “Enable Dye Preview” to show the equipment with any of the available colors in the game.
Previewing & Saving Outfits – FFXIV Glamour Guide
Speaking of the “Try On” feature, it’s good for more than just previewing dyes. This “Fitting Room” lets you essentially create mixed-and-matched preview outfits from any garment you encounter in the wild: be they from examining other players or browsing the market board. You can even “try” gear you’re already wearing. The benefit of which is that you can preview dyes and save individual items to an outfit preview.
That preview feature is actually the star of the show here. Simply click the square “Save/Delete Outfit” button on the bottom row of your Fitting Room window. This will lock into place any and all items you “Try On” — and any dyes you preview over them — for review later. It’s a good way to help you learn what an outfit might look like with one little change. Not to mention it’ll help you remember what the hell you wanted to buy and how you wanted to dye it if you need to purchase garments off the market board.
Glamouring NPCs – FFXIV Glamour Guide
At this point, you should know next to everything you need for FFXIV glamours. Now it’s time to apply them to yourself! If you want, however, you can also glamour NPCs… sometimes. Your options are currently pretty limited.
Once they reach level 51, any soldier in your personal Squadron (used for Squadron and Command missions, once again back at your Grand Company) can receive glamours from your personal collection (i.e. the Glamour Dresser). You don’t even need to approach the dresser itself; the whole process happens in your Grand Company barracks when you click on any squadmate.
These are randomly generated, nonspeaking characters. What about folks from the story? Well, there are a handful of options — usually with one or two added each expansion. They are, however, exclusively tied to fairly high-level crafting and gathering. You need to unlock “Custom Deliveries” and max out your relationship with whichever NPC assigns said missions. You do that by… completing more Custom Deliveries for them every week.
You should complete Custom Deliveries anyway. They’re a great source of Scrips and XP. Here’s a list of the relevant Custom Delivery NPCs so far:
- Ehll Tou: Unlocked in Ishgard as a level 70 crafter or gatherer
- Count Charlemend: Unlocked in Ishgard as a level 70 crafter or gatherer
- M’naago: Unlocked in Rhalgr’s Reach as a level 60 crafter or gatherer
- Kurenai: Unlocked in Kugane, after completing Kurenai’s series of side quests starting in The Ruby Sea, with a level 62 crafter or gatherer
- Adkiragh: Unlocked in Idyllshire as a level 66 crafter or gatherer
- Kai-Shirr: Unlocked in Eulmore as a level 70 crafter or gatherer
For one reason or another, two of these NPCs are not available to glamour. Presumably M’naago is off-limits because she’s a soldier and Ehll Tou because she’s… Well, she’s a dragon.
That is, finally, your complete rundown of FFXIV glamour! Enjoy your new fashion sense (and best of luck getting those rare treasure map materials)!