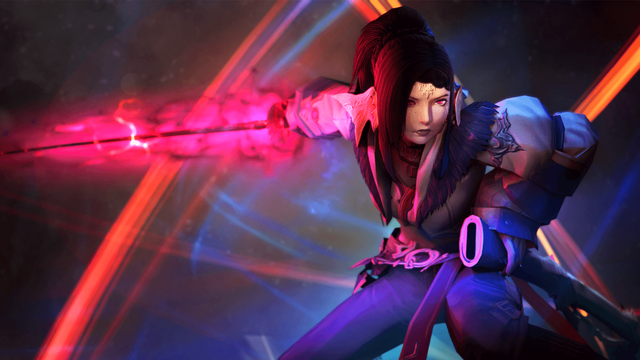
Samurai Job Guide: FFXIV Endwalker Changes, Rework, & Skills

The best sword is kept out of its sheath.

For too long, damage dealers in Final Fantasy XIV suffered under the yoke of having to do something other than dealing damage. This burden could be intimidating or it could be the factor that makes one Job more appealing than the rest; it could go either way. Whether you had to buff the party as a Bard or debuff the enemy to increase the party’s overall damage like Ninja, your focus involved something besides hitting the enemy hard.

The Samurai (SAM), in comparison, does not care about their party. The job is singularly focused on doing the most damage possible, slicing through foes with its razor-sharp katana. A Samurai doesn’t have friends; they have non-combatants that stand alongside them as they chop enemies to death. 

If that sounds appealing to you, here’s everything you need to know about playing Samurai.

FFXIV Samurai Combo
The power of Iaijutsu compels you.

I Studied The Blade – Main Attack Rotations

Let’s start with the standard rotation. Because the Samurai was added in a later expansion, Stormblood, you’ll begin at level 50 and there’s no prerequisite job. While other jobs may have one standard weaponskill combo, Samurai has a number of them based on what you’re trying to add to your Sen Gauge. We’ll dive into what the Sen Gauge is later; for now, you need to know that your Sen Gauge has slots for three distinct affinities: Setsu, Getsu, and Ka. These are then used for Iaijutsu, your strongest attacks.

But before we get into the deeper mechanics, let’s look at your various combos.

  • Combo to earn Ka: Hakaze (Lvl. 1) → Shifu (Lvl. 18) →  Kasha (Lvl. 40).
  • Combo to earn Getsu: Hakaze (Lvl. 1) → Jinpu (Lvl. 4) → Gekko (Lvl. 30).
  • Combo to earn Setsu: Hakaze (Lvl. 1) → Yukikaze (Lvl. 50).

Together, these three combos are your standard linear weaponskill combos. Since the Samurai begins at level 50, you’ll have all of these actions from the jump, but you should be cognizant of syncing to an earlier level.

An important aspect to these combos is that the second weaponskill in  the Ka and Getsu combos  grants a buff. The Ka Combo should be the first one you use in your rotation because Shifu gives you a buff that reduces weaponskill cast time and recast time, spell cast time and recast time, and auto-attack delay by 13 percent for 40 seconds. That basically means you attack faster. More, faster attacks means more damage. In the Getsu Combo, Jinpu increases damage dealt by 13 percent for 40 seconds, another flat damage increase. 

All three give you one of the affinities in the Sen Gauge. As you fill up the gauge, you use Iaijutsu (Lvl. 30), a single action that changes based on how many Sen you have in total (regardless of which ones you’ve accumulated). With any single Sen, Iaijutsu becomes Higanbana (Lvl. 30), which delivers a single-target 250 potency attack, a 60-second damage-over-time (DoT) effect for 60 seconds, and one stack of Meditation. With any two Sen, it becomes Tenka Goken (Lvl. 40), which is a 360 potency cone AoE attack that also gives a single stack of Meditation. Finally, if you have all three Sen, Iaijutsu becomes Midare Setsugekka (Lvl. 50), a massive single-target, 800 potency attack that also gives you one stack of Mediation. Iaijutsu does not break your weaponskill combos, so you can use it in-between any attack, but it does have a short cast time and is subject to your GCD. 

We’ll talk about Mediation in a bit. And keep in mind that each single weaponskill also increases your Kenki Gauge by 5 to 15 points depending on the action. Once again, we’ll talk about that in a bit.

Before that, however, let’s look at how to handle mobs with your AoE skillset.

  • Area-of-Effect Getsu Combo: Fuga (Lvl. 26) → Mangetsu (Lvl. 35).
  • Area-of-Effect Ka Combo: Fuga (Lvl. 26) → Oka (Lvl. 45).

Like their standard single-target combos, the Samurai has multiple area-of-effect (AoE) weapon combos. It’s worth noting that Fuga is a cone AoE attack striking in front of the Samurai, rather than being a full 360-degree attack; positioning is key with this Job. Mangetsu increases the duration of the Jinpu buff by 15 seconds, up to its cap of 40 seconds, and gives you one Getsu. Conversely, Oka increases the duration of the Shifu buff by 15 seconds and grants one Ka. Keep in mind that Mangetsu and Oka do not grant their respective buffs, so only extend them when they are active. There is no AoE combo that grants Setsu, so you’ll need to use the two-hit single-target combo occasionally.

Given all this, a basic combo would be something like this: Ka ComboGetsu ComboSetsu ComboMidare Setsugekka. You’ll notice that since the Setsu Combo is only two hits, the Midare Setsugekka actually completes the rotation of three combos with three hits each. Likewise, an AoE Combo would start with AoE Ka Combo, then AoE Getsu Combo, then Tenka Goken, a cone-based Iaijutsu action. In fact, this is the only time you really need to use Tenka Goken; outside of AoE situations, you’ll either be using one Sen for Higanbana or three Sen for Midare Setsugekka. 

However, there is one wrinkle! For longer engagements, you’ll want to use Higanbana since it is your primary DoT. As such, you’ll want to apply that to your target as soon as possible. And before you use Higanbana, you’ll want to have a damage buff active. 

Dipping into Kenki-based skills a bit, Samurai has Hisstasu: Kaiten, a buff that increases the potency of your next weaponskill by 50 percent and is active for 10 seconds. This action costs 20 points from your Kenki Gauge. Since each action in your basic weaponskill adds 5 points to the Kenki Gauge, this means you’ll actually need the first or second hit of your second combo to activate Kaiten. 

This means your standard opener is actually something like this: Ka ComboHakazeJinpuHissatsu: Kaiten (Buff)Higanbana (DoT)Gekko (finishes Getsu Combo). Following that, you’d kick off the basic combo chain I illustrated above. 

But wait! There are two more actions that paint the full picture here. The first is Meikyo Shisui (Lvl. 50), an instant action on a 55-second cooldown that allows you to execute up to three weaponskill combos without the combo prerequisites. This means you can get the full effects and Sen Gauge affinities from Kasha, Gekko, and Yukikaze without the previous actions, saving you the global cooldowns on the first attacks in those combos.

The second action you need to know about is Tsubame-gaeshi (Lvl. 76). This is meant to be cast directly after an Iaijutsu, and it repeats whichever Iaijutsu you just cast but with increased potency. Kaeshi: Higanbana (Lvl. 76), Kaeshi: Goken (Lvl. 76), and Kaeshi: Setsugekka (Lvl. 76) are the exact same as Higanbana, Tenka Goken, and Midare Setsugekka, respectively, just stronger. 

With both of these skills in the mix, your standard opener and combo rotation is something like this:

Ka ComboHakazeJinpuHissatsu: Kaiten (Buff)Higanbana (DoT)Gekko (finishes Getsu Combo) →  Meikyo ShisuiKashaYukikazeMidare Setsugekka (Iaijutsu)Kaeshi: Setsugekka (Tsubame-gaeshi) → Gekko (last weaponskill use for Meikyo) 

Let’s go into the ‘why’ of it all. The Ka Combo is your starter, dealing damage, giving you 15 Kenki and one Sen. Then, you start your Getsu Combo with Hakaze and Jinpu, giving you 10 more Kenki. You only need 20 Kenki to activate Hissatsu: Kaiten, your damage buff. While this buff is active, drop Higanbana, your DoT. Then, end the Getsu combo with Gekko, giving you Getsu Sen. You activate Meikyo Shisui to shortcut the rest of your weaponskill combos, letting you use Kasha and Yukikaze to get your Ka and Setsu Sen. With all three Sen, you can use Midare Setsugekka, and right after that, the follow-up Kaeshi: Setsugekka. Here, you still have one free weaponskill combo ender, so you use Gekko

Make sense? Your next step would be to go back to your Ka Combo, then Setsu Combo, then Hissatsu: Kaiten, then Midare Setsugekka. You’re basically trying to do your best to rotate between the three combos to fill your Sen Gauge to use Midare Setsugekka. Faster, kill, kill!

Endwalker Addendum

With the launch of Endwalker, Samurai hasn’t entirely changed. In fact, all that’s happened is that the team at Square Enix has layered new, similar abilities on top of the existing kit. A small change is that the Jinpu and Shifu buffs will also be applied by your AoE combos, under new names. The Fugetsu buff increases damage dealt and is shared by Jinpu and Mangetsu, while the Fuka buff is the attack speed one, shared by Shifu and Oka. 

You finally get an AoE Setsu combo with the addition of Hyosetsu at level 86. Continuing the improvement to Samurai’s AoE damage, there’s another new spell. Shoha is a high damage single-target attack that Samurai gets at level 80, which costs three stacks of Meditation. Shoha II is a new action gained at level 82, which is the same but is AoE instead of single-target.

Tsubame-gaeshi and Meikyo Shisui both receive new traits at levels 84 and 88, respectively, giving each of those abilities two charges. 

Finally, there’s a new action similar to Iaijutsu and Tsubame-gaeshi called Ogi Namikiri, which is gained at level 90. This ability only becomes active when you use Ikishoten, an existing action that simply gives you 50 Kenki Gauge points. In Endwalker, this also gives you the Ogi Namikiri Ready buff. With that up, you can use Ogi Namikiri, a cone attack that hits with 800 potency for the first enemy and 75 percent less for all other enemies. Then, that changes into Kaeshi: Namikiri, which is also a cone attack but one that hits for 1,200 potency and then 75 percent less for all other enemies. It’s a very powerful double tap for the max-level Samurai.

FFXIV Samurai Job Gauge

Gauge the Situation – The Sen, Kenki, and Meditation Gauges

Let’s do a bit of review, so we’re all on the same page now. The Samurai’s Job Guage has three sections. The first is the Sen Gauge, which has three glyphs. These glyphs light up depending on which weaponskill combo you use — Ka, Getsu, or Setsu. You can only have one of each Sen glyph, and the amount you have determines which ability is used when you activate Iaijutsu.

Then there’s the Kenki Gauge. Certain weaponskills give you anywhere between 5 and 15 Kenki while the gauge itself maxes out at 100. You can spend Kenki on various actions that are off the global cooldown (oGCD); it’s there to fill out your combos and overall damage.

Here are the abilities you spend Kenki on:

  • Hissatsu: Kaiten (Lvl. 52, 20 Kenki) – Increases the potency of the next weaponskill by 50 percent, 10-second duration.
  • Hissatsu: Gyoten (Lvl. 54, 10 Kenki) – Rushes target and delivers a 100 potency attack.
  • Hissatsu: Yaten (Lvl. 56, 10 Kenki) – Delivers a 100 potency attack and backsteps 10 yalms. Increases the damage of Enpi, your ranged attack.
  • Hissatsu: Shinten (Lvl. 62, 25 Kenki) – Delivers a 320 potency attack.
  • Hissatsu: Kyuten (Lvl. 64, 25 Kenki) – Deliver an AoE attack of 150 potency.
  • Hissatsu: Seigan (Lvl. 66, 15 Kenki) – Delivers a 200 potency attack.
  • Hissatsu: Guren (Lvl. 70, 50 Kenki) – Delivers an 850 potency attack in a straight line.
  • Hissatsu: Senei (Lvl. 72, 50 Kenki) – Delivers a 1,100 potency attack.

There’s also an action, Hagakure (Lvl. 68), that converts each Sen glyph into 10 Kenki each. Use this in-between encounters to “reset” yourself.  Alternatively, there’s Ikishoten (Lvl. 68), which increases your Kenki Gauge by 50 and has a 60-second cooldown.

The final Samurai gauge is the Meditation Gauge. This appears as three gems next to the Kenki Gauge. Using Iaijutsu and Tsubame-gaeshi gives you a stack of Meditation each, up to a maximum of three stacks. This is spent on Shoha, a 400 potency single-target attack. (In the last combo I illustrated in the Main Attack Rotations section, Shoha would go before the last Gekko.) In Endwalker, Shoha II is an AoE version of the Meditation spender. Meditate (Lvl. 60) is a channeled action that increases your Kenki Gauge for 15 seconds and gives you stacks of Meditation up to the maximum.

Other Actions in Your Arsenal

While we’ve covered the core function of the Samurai, there are still a few more actions that can come in clutch in certain situations. 

Third Eye (Lvl. 6) reduces the amount of damage taken by the next attack by 10 percent for 3 seconds. It also gives you the Eyes Open buff for 15 seconds. While under the effect of this buff, you can use Merciful Eyes (Lvl. 58) for an instant 200 potency heal, or the Hissatsu: Seigan Kenki spender listed above… until Endwalker launches because both those abilities are going bye bye.

Enpi (Lvl. 15) is your ranged attack with the longest range at 15 yalms. It also increases the Kenki Gauge by 10. The Hissatsu: Yaten action listed above causes Enpi to deal three times the damage. 

The rest of the available actions are your DPS role actions. As I said, the Samurai doesn’t have many actions that aren’t just attacks. Second Wind (Lvl. 8) instantly restores your health with a 500 potency heal, and it has a longish 120-second cooldown. Leg Sweep (Lvl. 10) is your standard Stun for three seconds, and Bloodbath (Lvl. 12) converts some of your physical damage in HP for 20 seconds.

Feint (Lvl. 22) lowers your target’s strength and dexterity by 10 percent for 10 seconds. Arm’s Length (Lvl. 32) nullifies most knockback or draw-in effects for 6 seconds. Finally, there’s True North (Lvl. 50), an action with two charges that nullifies the directional requirements of your actions for 10 seconds. You only have two actions that have positionals: Gekko and Kasha. 

FFXIV Samurai Endwalker Gear

General Best Practices

Deal damage. Not enough? Okay, let’s dig a little deeper. 

First, you should make sure you always have Higanbana on your target. You should also ensure Higanbana’s DoT is buffed by Hissatsu: Kaiten because then it does the most damage possible. Fully buffed, the Higanbana DoT does more damage than Midare Setsugekka, so it’s a big part of your damage. Also, Hissatsu: Kaiten should be used for either Higanbana or Midare Setsugekka to maximize your overall damage.

Enpi is your ranged attack, but don’t use it unless you have to. If you’re wasting time on Enpi or Hissatsu: Yaten when you could run in and out by yourself and use your stronger combos, then you’re wasting damage, as well. (Also, Enpi breaks your combos.) 

It’s a little hidden, but Gekko and Kasha are actually positional actions. When you use these actions in the correct position, you gain 5 additional Kenki. Gekko gives you the bonus when used from the rear, while Kasha gives the bonus when used from the flanks. If the positioning of the boss isn’t in your favor, activate True North.

Use Shoha when you have three stacks of Meditation. Don’t waste a stack of Meditation. Likewise, don’t overwrite Sen. For example, if you already have a Ka glyph, don’t use a Ka Combo.

Samurai Stat Priorities

Unless you’re clearing the highest level content (including Extreme or Ultimate trials or progressing through Savage raids), the stat performances aren’t really that important. 

Your general order of priority should be:

SkillSpeed > Critical Hit > Direct Hit > Determination.

The item level of your gear is the most important thing you need to worry about! You always want the strongest gear for your level. Not only will this give you the general stats you need to succeed, but it will also let you access certain content that is locked to ilvl. 

The Samurai is heavily based around your rotations. As such, Skill Speed is quite important, but the trick is that you want to stack to specific timing. As of Shadowbringers, 710-711 Skill Speed is a good, recommendable amount to reach a solid global cooldown. 

After that, you should cap out Critical Hit. This increases the damage done when you land a critical hit; it also increases the chance of that happening. You’ll want to follow that up with Direct Hit. This increases the chance of your attacks being direct hits, which do slightly more damage than a standard hit. These are both damage-centric stats because, again, your main stats of Strength and Vitality are taken care of via your gear. 

Determination is another offensive stat, but it’s not as important as the other two. It changes the amount of damage dealt by physical and magic attacks, but it’s sort of the odd man out in terms of overall usefulness. 

The best food and potions to use change with the tides (i.e. new recipes with each patch and what you can afford from the market board or make yourself). But Smoked Chicken is the go-to meal by the end of Shadowbringers.

Final Thoughts

The Samurai provides little additional utility to your Light Party or Raid. While other DPS jobs occasionally have to do things outside of dealing damage, the Samurai has none of that. The Samurai is merely there to stride out onto the field of battle and slice things to death with their sword. Truly, it is a selfish job in the same way that the Black Mage is.

And there’s nothing wrong with that. If you just want to deal damage up close, with no Monk or Ninja shenanigans, then the Samurai is the Job for you. Get out there and live out your Akira Kurosawa-influenced dreams.